Syntax
The code in this and previous blog posts can also be found here, on Codeberg. Check out the repo at the commit marked “blog 08”.
So far, I only talked about the abstract syntax of MyFPL. Now, it’s time to address a large, pink-ish elephant in the room: concrete syntax.
Projectional editing
You might’ve noticed (in blog posts 01 and 02) that I have a certain fondness for projectional editing. (Disclaimer: I wrote a book about it ;)) A projection for a language is a function that takes any AST in that language, and renders that in a human-readable form: the language’s notation. Typically, a projection takes any node in an AST, and calls itself recursively for (all of) its children. By passing the AST’s root node to the projection, you get a rendering of the whole AST.
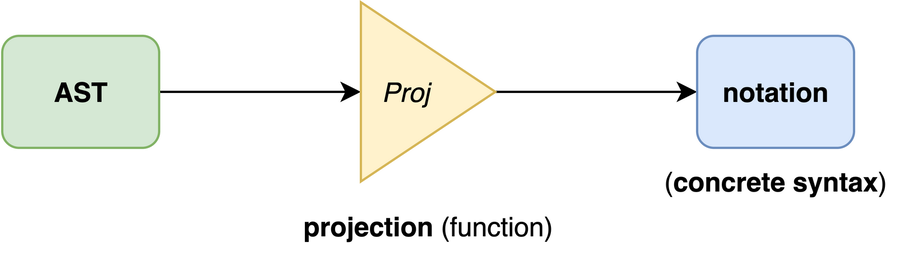
There’s considerable freedom in that human-readable rendering: it could be textual, but it can also be something thoroughly graphical, or something in between.
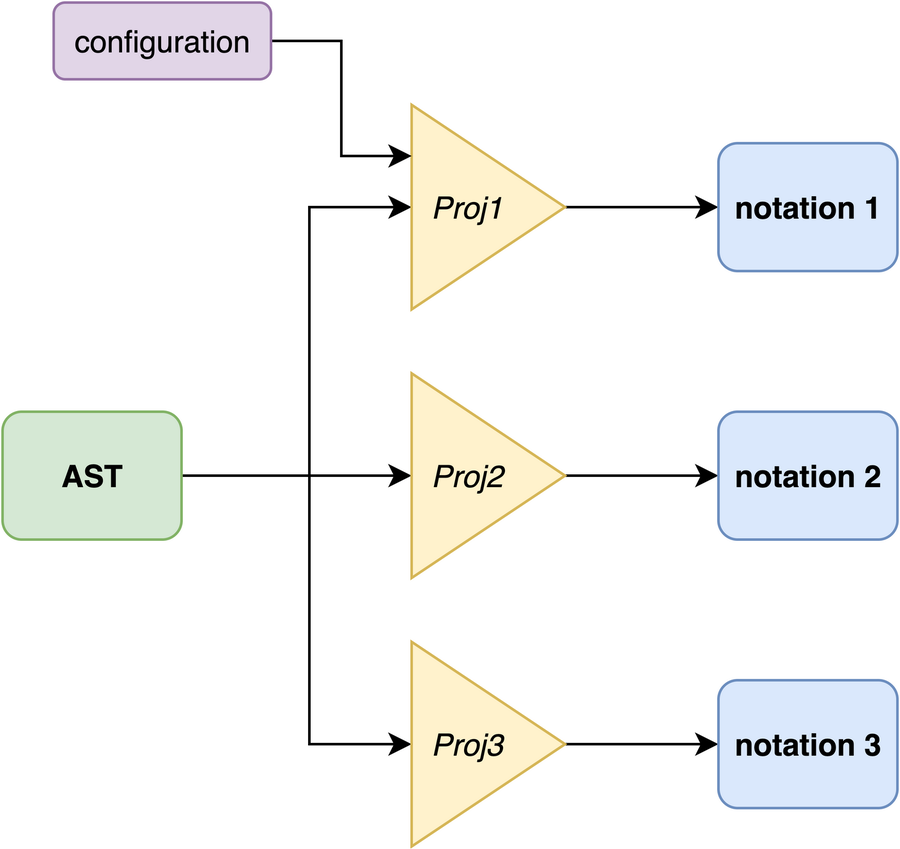
In blog post 03, I hinted at the possibility of having multiple syntaxes — this is just a matter of implementing multiple projections. You can even make a projection configurable, e.g. choosing to display certain things or not.
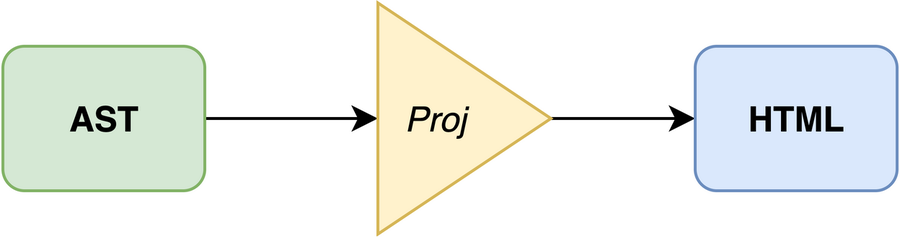
For MyFPL, I’m going to render ASTs as HTML with a modicum of CSS styling. “Everyone” knows HTML (with CSS, allegedly…), and it gives a lot of freedom, including that of using SVG for graphical notations, if one would so desire.
A projection can – in principle – be turned into an editor. For a plain text syntax, that would most likely mean parsing the rendered-and-then-modified text as an AST, comparing that with the original AST, and patching the original AST with changes inferred from that comparison. This is a very well-known but actually pretty cumbersome approach, with challenges such as having to come up with a(n unambiguous) grammar for the textual notation, resolving references from partially or fully-qualified names, and implementing an LSP server.
We can keep the architecture really simple by implementing a projection that renders the AST in a “rich” format such as HTML. Such as projection can relatively simply be extended to trigger actions that modify the AST in a precise way.

In my book[1], I use a combination of the React and MobX frameworks to implement a projection and editor from scratch. For this blog series, I’ve decided to hold off on the editability part of the projection for a while. Adding editability to a projection requires quite a bit of work to get to a decent level of usability, which I think distracts from the overall goal of the blog series. This avoids having to implement any interaction, but has the downside we have to – for now – rely on crafting ASTs by hand to be able to show the projection works.
Adding the Program concept
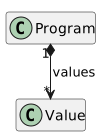
At this point, a program can only consist of just one value, which is a bit boring — even if the value is deeply nested. To remedy that, we add a Program concept holding any number of values. Diagrammatically:
Add the following code to the packages/build/src/structure.ts file:
const Program = factory.concept("Program", ConceptModifier.concrete) (1)
factory.containment(Program, "values").ofType(Value).isMultiple().isOptional() (2)
Definition of the Program concept (in the packages/build/src/structure.ts file)
- Construct a concept (as instance of LionWeb’s
Concepttype) namedProgram, that’s concrete — i.e., instantiable, and non-abstract. The concreteness is indicated using theconcreteliteral of theConceptModifierenumeration — make sure to import that type. - Add a containment named
valuesto theProgramconcept, of typeValue, and cardinality 0..* because it’s multiple and optional.
Run the generate task in packages/build to update the generated source code.
Now we can construct a program that consists of more than one value, as follows:
import { BinaryOperator } from "./MyFPL.g.js"
import { Shorthands } from "./shorthands.js"

const { binaryOperation, booleanShorthands, program } = new Shorthands() (1)
const { trueLiteral, falseLiteral, booleanType } = booleanShorthands

const myProgram = program() (2)
myProgram.addValues(binaryOperation(BinaryOperator.and, trueLiteral(), falseLiteral())) (3)
myProgram.addValues(binaryOperation(BinaryOperator.or, falseLiteral(), binaryOperation(BinaryOperator.and, trueLiteral(), trueLiteral())))
myProgram.addValues(booleanType())
Construct an example program (in the new packages/my-fpl/example.ts file)
- Also import the
programshorthand — see the listing directly below. - Construct an instance of
Program. We name the constantmyProgram, because we’ve already destructuredprogramfrom theShorthandsinstance. - Add some values to the program.
program = (): Program => Program.create(newId())The implementation of the program shorthand, as a member of the Shorthands class (in the packages/my-fpl/shorthands.ts file)
Implementing the boilerplate
I like the JSX/TSX syntax to produce HTML. So, even though we won’t be using React to implement any interactions, I’ll use React to render an(y) AST as HTML. This sounds a lot like SSR – Server-Side Rendering, which is essentially what I’ll be doing.
Before we can start implementing the actual projection function, we have to implement some boilerplate. To be able to use JSX/TSX syntax, we have to have the line "jsx": "react", present in the compilerOptions section of the packages/my-fpl/tsconfig.json file. Then, we can create the packages/my-fpl/renderer.tsx file, and give it the following contents:
import { readFileSync } from "node:fs" (1)
import React from "react" (2)
import { renderToString } from "react-dom/server"
import { Program } from "./MyFPL.g.js"
import { Projection } from "./projection.js"

const css = readFileSync("src/styling.css", { encoding: "utf8" }) (3)

export const rendered = (program: Program) => (4)
    renderToString( (5)
        <html>
            <title>MyFPL example</title>
            <style>{css}</style> (6)
            <body>
                <div className="layout">
                    <Projection node={program} /> (7)
                </div>
            </body>
        </html>
    )
Implementation of the renderer (in the new packages/my-fpl/renderer.tsx file)
- Import from the Node.js API. For this to work, you have to execute
npm addd --save-dev @types/nodeon the CLI, and then add the line"types": ["node"]to thecompilerOptionssection of thepackages/my-fpl/tsconfig.jsonfile. - Install the necessary NPM packages for this
importstatement to work. Do that by executingnpm add react,npm add react-dom, andnpm add --save-dev @types/react-dom. - Read the CSS file – see the second listing below – in as a string.
- Define a
renderedfunction that returns a rendering of aPrograminstance as HTML. - The call to this function does what it says on the tin: it renders the given JSX/TSX syntax directly as (plain text) HTML.
- Include and activate the contents of the
packages/my-fpl/styling.cssfile, by quoting thecssstring verbatim inside<style>tags. - Call the actual projection with the AST’s root node, which is the instance
programofProgram.Projectionis a stateless React component imported fromprojection.tsx— see the first listing below.
Implementing the projection
We only have BooleanLiteral, BinaryOperation, and BooleanType as concrete – i.e.: instantiable – concepts, so the effort for the actual implementation of the projection function (including CSS styling) is still pretty minimal.
import { INodeBase } from "@lionweb/class-core"
import React from "react"
import { BinaryOperation, BooleanLiteral, Program } from "./MyFPL.g.js"
import { reduced } from "./reducer.js"

export const Projection = ({ node }: { node: INodeBase }) => { (1)

    if (node instanceof BooleanLiteral) {
        return <span className="literal">{node.value ? "true" : "false"}</span> (2)
    }

    if (node instanceof BinaryOperation) {
        return <div className="inline"> (3)
            <Projection node={node.left} />
            <span className="keyword ws-both">{node.operator}</span>
            <Projection node={node.right} />
        </div>
    }

    if (node instanceof BooleanType) {
        return <span className="type">Boolean</span> (4)
    }

    if (node instanceof Program) {
        return <div className="program"> (5)
            {node.values.map((value) => (6)
                <div className="program-row" key={value.id}> (7)
                    <div className="value">
                        <Projection node={value} /> (8)
                    </div>
                    <div className="value">
                        <Projection node={reduced(value)} /> (9)
                    </div>
                </div>
            )}
    }

    return <div><span className="warning">projection undefined for node of concept {node.classifier.name}</span></div> (10)
}
The projection, as the Projection function (in the new packages/my-fpl/projection.tsx file)
- Define the
Projectionprojection function. It takes a node of a general type for nodes, coming from the@lionweb/class-corepackage:INodeBase. - Project a boolean literal.
- Project a binary operation.
- Project a boolean type.
- Project a program.
- Loop over the values in the program.
- React demands that each
<div>element produced by a loop such as this, has a uniquekeyattribute value. - Call the
Projectionfunction with a value in the program, wrapping it inside<div class="value">tags. - Do the same, but for the reduction of the same value, which you calculate using the
reducedfunction implemented in the previous blog. - Show a warning when
nodehas a concept that’s not handled by the projection.
Finally, we need some CSS to produce a layout that’s not outright “fugly”:
body {
    font-family: Arial, Helvetica, sans-serif;
    font-size: 24pt;
    display: flex;
    justify-content: center;
}

div.layout {
    width: 80%;
}

span.literal {
    padding-left: 5px;
    padding-right: 5px;
    border-radius: 5px;
    background-color: #ddd;
}

span.keyword {
    font-weight: bolder;
    color: #666;
}

.ws-right {
    margin-right: 0.5rem;
}

.ws-left {
    margin-left: 0.5rem;
}

.ws-both {
    margin: auto 0.5rem auto 0.5rem;
}

div.inline {
    display: inline-block;
}

div.program {
    display: flex;
    flex-direction: column;
}

div.program-row {
    display: flex;
    padding-bottom: 1rem;
}

div.value {
    flex: 1;
}

span.warning {
    color: red;
}

span.type {
    font-style: italic;
}
CSS to style the projection (in the new packages/my-fpl/styling.css file)
I won’t explain anything about this CSS, other than that I’ve tried to keep it as minimal as possible. Just take it as a given, and don’t worry about it — I won’t either ;)
Running the example
Now, we can call the rendered function, and write the resulting string to the example.html file, by adding the following code to packages/my-fpl/example.ts:
import { render } from "./renderer.js"
import { writeFileSync } from "node:fs"

writeFileSync("example.html", rendered(myProgram))
Calling the renderer (in the packages/my-fpl/example.ts file)
Now, you can execute the HTML renderer, which projects the example program defined in the packages/my-fpl/src/example.ts to the HTML file packages/my-fpl/example.html, as follows:
npm run build
node dist/example.js
Use any browser to view the result by opening the packages/my-fpl/example.html file with a browser, which should look as follows:

We could make this visually nicer, but it’s OK for now, and I don’t want to spend any more time and lines of code – or CSS – on that.
© 2026 Meinte Boersma (DSL Consultancy)
Footnote
1] Apologies for another shameless plug of it.